|
|
|
|
|
I've had these tubes in 'stock' for about twelve years, and used them for all sorts of things, then came across a website showing how to make wind turbine blades from lengths of pipe, Eureka... I've got some planks that I've glues together in order to carve some blades, of which I wasn't looking forward too. Back to my tubes. These tubes are made from GRP and are precision made for use on a printing press which holds the impressions. They're about 5 foot long with an inside diameter of 150mm. As tubes they are incredibly strong. When ever I make anything, I try to create jigs so that I have good repeatability for future components. I've seen many sites where they have given various profiles and angles. All good, however not easy to mark this tube then follow lines when cutting, so after much thinking I came up with the idea of using the saw bench as this stuff isn't very pleasant to cut, hence the saw bench being moved outside! I set the bench up to make a slice all the
way down the length of tube. |
When I carried out the first cut above, I found towards the end
the blade started to bind heavily, so I stopped the saw and finished the
cut off by hand. Having found the tube wanted to close up, I came up with
the idea of inserting some M6 cap screws to keep the slice open as I
needed to use the slice for the next process. |
After the first cut, I set up a fresh guide
so that the tube was held on the blade so the cut is made at 6 o'clock. |
Moving on from the above guide, I set up a bit of angle metal on an even
bigger bit of angle, so that the first slice of the tube runs along the
bit of angle. The bit of angle was positioned so that it kept the slice at
9 o'clock, thus enabling me to cut the tub in to quarters or 90 degree's
which ever is closest! |
Just a quick photo to show the idea of the above guides  |
My tube cut down to four quarters. The red colouration is from where the
material was pinching the saw blade.  |
More guides. Using a length of board, I screwed my quarter of tube to it
at an angle to achieve a long tapered blade. The 'blank' was held in place
with a screw either end, then with the first one in place I screwed
another bit of timber along the one side so that I could fix the following
'blanks' in the same place. With the 'blank in place and the guide on the
bench, it was easy to make a quick easy slice to make a matching set of
blades. The dark block of wood at the end of the plank is to hold the two
halves together.  |
The consequence of my process is that I get two sets of four blades, the
one set being slightly shorter than the other. The shorter set I'm passing
on to a friend who helps me out a lot as he's also got a PM motor, though
not as big as mine.  |
As pointed out earlier, the tube in its original format is, or was very
strong, however after my processing, I found there was little strength in
the concave direction of the blade.  |
Just a close up of the damaged blades.  |
To overcome the weakness I've discovered my
blades have, I've traced round the blades on some fibre glass cloth to cut
them out for use on the blades.  |
After an hour or so, I've managed to rough the surface up of the blades
and coat all eight blades with the GF cloth and resin.  |
Just a close up of the resin impregnated GF cloth which I found gave the
blades enormous strength, so I'm pleased with the result. 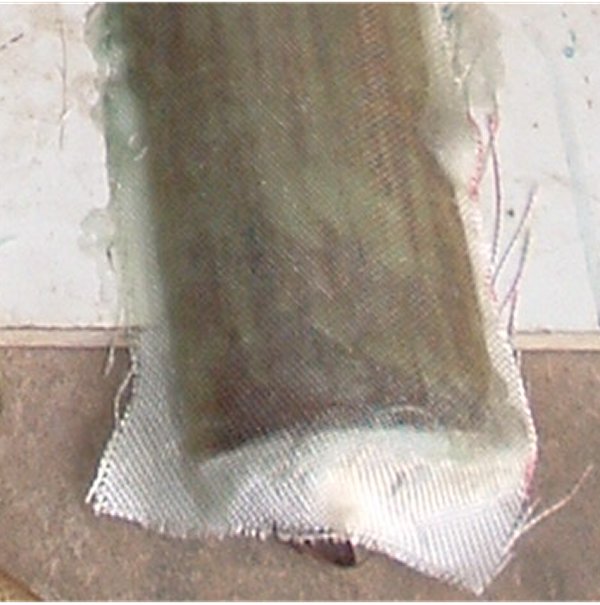 I've been looking around the web to see what others are doing with their 'tube' blades, and come across one site that has covered the concave side of the blades to make them flat. I'm not yet sure if this is a route I'll follow just yet, as no one has given any follow up results of this idea. |
I found the blades are not easy to lay on a bench to work on them, so
after faffing around, I managed to clamp my belt sander on to the saw
bench which made sanding so much easier. I must point out, before anyone
looking for faults say so, I use a full face mask with forced ventilation
to avoid inhaling any dust created by the cutting and sanding processes.  |
| more bits to add on blades as I progress them further. |
Its been a concern of mine as to how to hold the blades at the correct
angle, so came up with the idea of making some wedges. First problem being
how to create the correct radius for the back of the blade, so came up
with the idea to coat another tube in cling film and apply release agent.  |
Using a length of timber with a small sheet of pvc with release agent
applied, clamp this to the above tube using cable ties, then block off the
ends using plastacean (duno how to spell that word, its the stuff like
puty that kids play with) gives me the ideal shaped mould to get blocks of
the correct radius for the blades to sit in.  |
Resin and chopped strands applied.  |
Resin block removed from its mould.  |
Just another shot of the resin block. I'm going to remake these, as I'm
not happy with the result. After removal from the mould I noticed light
patches which was confirmed when I sliced the block down. The light
patches are areas of chopped fibre glass that hasn't socked up the resin.
Basically I was rushing the job as the resin was starting to go off to
quickly.  |
| New
development! Due to exchange
rates etc. I found some cheap blades from the States which I'm going to
run with. |
|
text to follow |
|
text to follow |
|
text to follow |
|
text to follow |
|
text to follow |
|
text to follow |
|
text to follow |
|
text to follow |
|
text to follow |
|
text to follow |
|
text to follow |
|
text to follow |
|
text to follow |
|
text to follow |
|
text to follow |
|
text to follow |
|
text to follow |
